30 November 2012

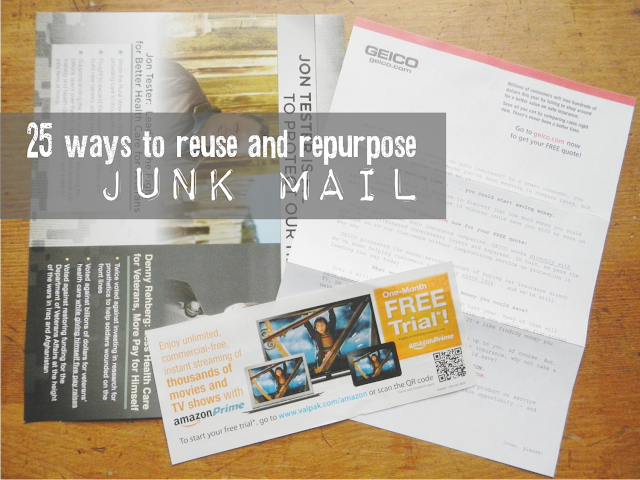
25 Ways to Reuse and Repurpose Junk Mail

This post is written by contributing author Annie of Montana Solar Creations.

Reusing and repurposing junk mail has become a daily activity in our household. It has become a fun adventure to find new ways to reuse junk mail instead of just throwing it out. Junk mail fills our mailbox almost everyday: credit card offers, advertisements, catalogs, insurance offers, political ads and the list goes on.

25 ways to reuse junk mail
We cannot recycle paper in our area so we used to throw junk mail in the trash to be shipped off to the local landfill each week. Now we find all sorts of fun uses for junk mail. Each day when we check the mail, we search through the pile of junk mail and see what creative ways we can reuse it.


Here are 25 ideas for how to reuse and repurpose junk mail:

1. Make a paper airplane.

2. Coloring paper for kids.

3. Use blank sides of paper to print mailing labels.

4. Use colorful paper or catalogs for wrapping paper.

5. Crumple it up and use it for packaging materials.

6. "Free" child's toy. Our daughter loves playing with junk mail and it provides hours of entertainment.

7. Make upcycled beads for jewelry.

8. Use the blank sides for scratch paper or list making.

9.  Find colorful pictures and turn them into gift tags or hang tags for your products if you're a vendor.

make labels out of junk mail


10. Fire starter. Any newsprint junk mail we get is put into a crock by the woodstove with the kindling to use as fire starter.

11. Cut it into strips and use it as a bookmark.

12. Reuse the return envelopes that come in the junk mail but make sure to cover any bar codes on the front of the envelope.

13. Make your own envelopes from the paper.

14. Cut strips and glue them together to make a holiday count down chain.

15. Have children cut out pictures and shapes to make a collage.

16. Make a hand held accordion fan. This was a favorite for us over the summer!

how to reuse and repurpose junk mail


17. Use the paper and catalog pages for origami.

18. For Etsy sellers: Use blank sides of paper cut into small pieces to write a little thank you note to send along in a package.

19. Make holiday collage cards. Cut out pictures or shapes from the colorful
junk mail catalogs and make your own unique upcycled cards.

20. Cut out sewing patterns. I use this for patterns I print off the internet and ones I draw myself.

21. Lay down pieces of junk mail to cover the table or counter for protection when working on a messy project.

22. Cut out paper snowflakes. We like to pick the most colorful pages out of a catalog to make our paper snowflakes.

how to reuse and repurpose junk mail

23. Use blank sides for invoice lists. When I deliver products to shops I sell at in town, I take an invoice list written on the back of repurposed junk mail and the shop owners appreciate the creative repurposing!

24. Use blank sides of paper for recipe cards.

25. Make your own large size mailing envelope by having the blank sides of paper facing out and wrap clear tape around it for protection. We just received a package like this and can't wait to try making our own!

How do you reuse and repurpose junk mail?


Annie lives in western Montana with her husband, 15 month old daughter and two lazy dogs. Annie is a frugal, nature loving, simple living, work from home mama with an Etsy shop. She also blogs at MontanaSolarCreations where you can find DIY projects, real food recipes, natural living tips and stories about their outdoor adventures in Montana.
29 November 2012

The Easiest DIY Sore Throat Recipe for Any Kitchen


This post is written by contributing author Cory Trusty.


There are many sore throat cold remedies that can be made up in the kitchen. The easiest and most accessible is a simple salt water gargle.  A salt water gargle helps reduce painful swelling and may fight infection as well.  It is a great option especially if you are home bound, and not feeling able or up to going out to the store for cough drops or other remedies and ingredients. Just two ingredients are needed, fine salt and water.
Photo by Sanja Gjenero

Salt Water Gargle

  • 8-10 oz very warm water 
  • 1/2 - 2/3 teaspoon of fine salt, sea salt is preferable
Notice there is some flexibility with the recipe.  You can dissolve the salt in water and taste it to make sure it doesn't taste overly strong to you.  Swish and gargle with the solution about 4-5 times in a row.  For best results, repeat this every few hours as needed. Older children as well as adults can benefit from a salt water gargle, but it cannot done safely by smaller children. It is dangerous for a salt water solution like this to be swallowed, so make sure your children know how to gargle plain unsalted water before you offer them a salt water solution to gargle.


Photo by Richard Dudley
If you are desperate for a remedy for a young child who can't gargle, here are a few ideas you can try and they are great for adults too in case you have any of these ingredients, or remedies to work with:
If I have an ear ache together with a sore throat I like to use the salt water gargle together with this Aromatherapy Ear Drop Recipe.  

Be well,
Cory Trusty

Cory's Kanelstrand blog posts are licensed under Creative Commons.  You are free to copy, distribute and adapt Cory's Kanelstrand content provided you attribute it to her by linking back to the original post as well as Cory's AquarianBath.com website.

Cory Trusty is a soap maker, community herbalist, organic gardener, and homeschooling mom to two girls. Cory and her family live in Daytona Beach, Florida. Cory's background is in Traditional Chinese Medicine and Biology.  She is sharing tried and true natural home remedies and mini lessons from herbal classes that she teaches. Cory works full time making soaps, shampoo bars, herbal salves, flaxseed heat packs and more for her website AquarianBath. Read more from Cory at the Aquarian Bath blog. Cory is also a Food and Gardening writer for EcoEtsy and has published in The Essential Herbal Magazine and on the Herb Companion Blog. Connect with Cory on TwitterFacebookGoogle Plus and Pinterest.


28 November 2012

Snappy Rockfish Giveaway

Today I would love to talk more about why I love handmade soaps. I haven't started making mine yet but I still drool at the sight of any eco soap made by a human hand.

That is why today I teamed up with Brittany of Snappy Rockfish Soap to offer you a chance to enjoy her handmade soaps and hopefully inspire you for a more nature-related life.

Knowing what is in the soap and choosing organic ingredients has always been important to Brittany and that is why her soaps are scented with essential oils and colored with herbs and spices, not fragrance oils and unnatural colorants. Most of her soaps are even vegan, except those made with milk or honey.

This lady is even naming her soaps and for the most part, the names are inspired by her home state, Alaska. Living there taught her all about the importance of nature and how our actions affect the world around us.

Today and only for a week, Brittany offers you a chance to win a set of 3 + 1 soaps!

The set includes:
  • Chinook (grapefruit orange)
  • Dolly Varden (peppermint rosemary)
  • and Snappy Rockfish (lemongrass ginger)
The fourth soap you get to choose yourself but be careful because there is a high chance of you wanting to have more!


And while we are talking about Brittany's creativity, make sure you visit her Smarty Pig page and donate a small amount to her cause. Every $1.50 of each soap sale goes toward her Antarctica fund to help her go there in February of 2014! 

The giveaway is open worldwide until December 5th. To participate, just follow the Rafflecopter widget.

a Rafflecopter giveaway

27 November 2012

How to Grow Your Business with Pinterest

I spent (wasted) a good deal of time keeping away from Pinterest simply because I couldn't see how it can help grow my business. I thought it was simply a means to collect and display visual candy, and, aiming to develop a professional online presence I clearly didn't have the time to indulge myself in the business of pinning, regardless of the fact that it was getting bigger than Google...
Graphic: MRBECK


I wrote numerous comments to one of the most avid pinners I know, Paige of Little Nostalgia saying that "Ah yes, great images in your post about Pinterest but I really don't get it and I don't even have the time!" And I kept on doing this for months.

Until my husband loved it.

I figured that if a man can spend days on Pinterest, watching eye-popping map art, it should have more to it than what I initially thought. And yet again, I let it sit in the back of my mind with increased value this time.

As the months progressed I made feeble attempts to pin and repin, which was not that bad, in fact I got so much inspired by all the amazing art I found over there. But couldn't spend so much time just "fooling around".

And then Pinterest became the main source of pageviews for Kanelstrand and raised the traffic tenfold!

I finally got it, Pinterest is powerful and it really has a strong connection to my business!

Yesterday I read an article titled How to gain 25,000 Pinterest followers in 3 days.

Andrew Miller (note to self: he's male!) increased his followship on Pinterest 100 times in just 3 days! The number of his followers grew from 250 to more than 25,000! He even received serious job offers thanks to the impressive results of his pinning.

I definitely needed to forget my Pinterest presumptions as he suggested. I guess he's had some too, now that he's mentioning it. I hope this similarity makes me eligible to become a top pinner. 

Another great post full of advice on how to use Pinterest to drive your business is, in fact, an interview with Kanelstrand contributor Rebecca Dillon. She already has more than 13,000 followers and has quite a lot to teach us.

Going through a bunch of other Pinterest related articles, I devised a simple plan of 6 steps.

Pin one step at a time
Spend 15 minutes a day pinning. There is no need for the process to span for hours. Plus, this will eventually make you hate it.

Be honest
Pin things you genuinely like. Don't just pin irrationally just for the sake of pinning.

Be organized
Think about the way you are going to organize your boards and be consistent in adding to them.

Learn from the best
Go to Repinly and find the top pinners. Learn from what they do, note the number of boards they have, the topics and see how you can apply the new knowledge.

Be yourself
Don't simply copy. In a world full of information, copying won't do you any good. Try to add your unique interests and perspective. You are more likely to attract more followers by setting a trend than by following one.

Be patient
Keep on pinning. The more you do, the more people will have to look at and deem your boards valuable.

Now you might be thinking: What's the deal here? Well, there is a bigger deal than you might expect. The more valuable your pins, the more people will follow you and the more people will repin your pins.

That is what will lead tons of traffic to what you pin, be it blog posts or your items on etsy, ensuring steady traffic you have never dreamed about.

And while we're at it, follow me on Pinterest, I have some really cute Scandinavian design to share with you!.

I know a lot of you are more experienced Pinterest users, let me know if I missed anything. What are your tricks on Pinterest?

23 November 2012

DIY: Illustrated Candle Holder Covers

This post is written by contributing author Anabel Bouza.

Don't you love that moody flicker of candlelight? It expands the limits of a room, helps create a quiet atmosphere... Electric light can feel ruthless and impertinent by comparison.

Ever since a line-up of candles settled on my ledge for the season, I've been coming up with ways to dress them up temporarily. My tea lights live (and burn) inside generic glass containers, which I have cleaned and repurposed after their original candles ran their course.

In the spirit of season, I would like to share a DIY project for candle lovers. The graphic look of these covers will turn your generic glass holders into a fun wintry scene.

Just print the file on a regular A4 sheet (8.5 x 11), cut inside the yellow lines, and secure with transparent tape where the edges meet. 

I use single-side tape to keep the paper cover from sticking to the glass, that way is easier to remove in a pinch.

Have time and an X-acto knife? Then go ahead and modify "Behind the Fence" by cutting out the white triangles for the light to shine through.

Click to download.

These covers are not meant for exposed candles. They fit the standard Glade 4-ounce candle jars, and the small tumblers sold by Yankee Candle, respectively. 

Using tea lights (or some other small candle) inside the jar keeps the flame from burning too close to the edge. Something I like about tea lights: the fact that they don't burn for too long means you're not forced to live with the same fragrance (or any fragrance at all) every time you crave candlelight. 

Especially now that the nights have grown longer, the lighting of a cozy flame can help usher in a relaxing evening, after leaving the day behind. If it pains you to get rid of perfectly good glass containers —my case!— a tea light and a unique jar cover are the perfect way to create instant magic.


Anabel Bouza insists there's powerful magic in the action of creating something out of a vague vision, a chill of inspiration. She is an illustrator with a passion for nature, paper manipulation, and pointing her camera at things.

Her appreciation for simplicity dates back to a former life in Cuba - her strange homeland - where she refined the ability to see the alternative uses of common objects, and the enchanting side of things. She's often found blogging as
Weird Amiga, hard at work in her sunny studio, or staring at things as if looking at them for the first time. Her tiny family is comprised of her husband & a turtle; they're new to the city of Chicago, and they love it. Connect to Anabel via facebook and twitter.


22 November 2012

Survey Result and a Big Thank You

When I started the blog survey last week I had no clue what a long way I would go in just 7 days. I posed a few questions to you and I was overwhelmed with the amount of love I received from you. I wanted to makes some changes to this blog but because I realize that building it is thanks to you I wanted to know what you think. And you helped me immensely in taking some very important decisions.

So, THANK YOU!

Thank you for being here with me.

Thank you for the time you spend on Kanelstrand.

Thank you for sharing the Kanelstrand content with your friends and the world.

Thank you for voicing your opinions any time you feel this is important.

Thank you for helping this blog grow!

The results of the survey are being processed now but let me tell you, you became the trigger for great changes that are to start happening very soon. There will be changes in layout, hosting, blogging platform and functionality. And I am sure you are going to love them!

I promised 95% discount to my etsy shop for one of you who took the survey and the winner is...


By the way, you should check her shop, there are some incredibly cute Holiday gift ideas in there!

In the meantime, have a wonderful Thanksgiving and enjoy the latest video I compiled of my photos as a presentation of my shop.


I would love to know what you think about it (I am pretty new at this)!


19 November 2012

A Portrait of the Artist: Flora Beauty

Do you remember the Flora Beauty giveaway in October? Today Mirjam and I are shedding more light on her creative process and the inspiration that drives her.

In the beautiful Flora Beauty etsy shop you can find botanical jewelry with real flowers, designed, created and photographed by Slovenian PhD, Mirjam.

What makes her shop stand out from a bunch of others is the eco-friendly, non-toxic resin she uses for covering her herbaria - the carefully picked beautiful flowers, pressed for weeks to dry completely and embed in jewelry.

Mirjam's love to nature and exquisite attitude to the arts can be felt in every piece in her shop. 


Tell us a little bit about your background. How did you start on your creative journey?
I was born to parents and older sister that all liked to work with textiles and knitting yarns. Father was making upholstery furniture and my mother knew how to sew, knit, make embroidery and crochet whatever she imagined to. When I was 5 or 6 she bought me a little hand-looms. I spent so many hours weaving and weaving. She taught me everything that she knew. My first passion for a very long time was knitting. When I was in high school I made myself 38 sweaters! Can you imagine that? No wonder that I graduated from textile technology and made my Master in the same field.

Your jewelry is unique and truly unforgettable. How did it occur to you to encapsulate real flowers in resin?
Well, my mother also taught me a lot about herbal remedies and natural plants. We've made plenty of greeting cards with dried flowers. But I once read that greetings cards usually stay somewhere in the storing boxes with other things. 

About half a year ago, I started making botanical jewelry. I am trying to keep the lovely plants and flowers forever in a way that people can bring the nature with them wherever they go. Embedding them in jewelry bezels seemed a very good idea to me and not many people were doing this. I have never thought that this would evoke so much passion in me. And my first results as a self-taught jeweler were so great! I was continuing with the creativity and making pieces that were more and more beautiful.
Pressed flower necklace
I know you have been using non-toxic resin for your creations. Most people don't think about the way they work affects the environment. How did you choose that particular resin?
Uff, I've spent so many hours surfing and reading about all sorts of resin. And after reading and reading I was very surprised about the fact that people who have been working with traditional resins for years did not (want to) use the protective gloves and masks. Traditional resins show some potential hazards to health and environment. 

I read that a lot of people did not know that, or even worse that have not inquired about the ingredients of the resin and its toxicity. But one day I came across the new resin that has been completely different from the traditional ones. I have tried to collect all the information about its toxicity and each article, review or research that I have read sounded promising. I have studied the ingredients of this new resin; I even wrote to its designer and manufacturer just to make sure that it is not harmful to the environment or me. And it is not.

Can you tell us more about the way you make your jewelry? How long does it take for a pressed flower to be good enough for a ring or a pendant?
The whole procedure takes quite some time. One of the most important parts of the work is to choose the right time to pick the plants. You should always pick them on a sunny, dry day, neither in the morning nor evening but around noon when they contain no moisture. Then I press them for several weeks (3-4 weeks) to make them fully dry. This is how they keep their shape and most of their colors. But there are flowers that always change their color while drying; red flowers turn to brown almost always and sometimes even pink ones.
Woodland earrings


What other creative outlets do you have?
As I mentioned earlier, I am very experienced in knitting, crocheting, embroidery, sewing, stitching. I have been practicing them for about 20 years now. When knitting a simple pattern I even manage to read a book at the same time ☺. If it is possible I try to combine all my skills when making one single item. Knitting cardigans with appliqued embroidery is one of my favorites. And I adore stitching! I only wish I have more time. Besides the full employment, small child, and my PhD research, there is not much time left for creating.

What do you do to keep inspired?
I must mention first that I rarely wear jewelry. But walking through woods, in the fields, observing the colors of nature get me most of the inspiration. I already get the ideas of my new items when I pick up the flowers. But here is a catch! During the weeks, when the particular flower or plant is drying, I discover so many ways to arrange it in the jewelry bezels! And that makes me sometimes very impatient and confused. But when I lack inspiration, then I open my album, where I keep my dried flowers and plants, and just look at them for a while and the inspiration always returns. It is funny to say but I usually get most of the ideas in the morning just during  awakening.
Real hydrangea necklace
What is your current favorite item by another etsy seller?
I adore Krisztina’s shop from Hungary, My rainbow world. Her creations are so unique! I like her style. Here is one of my favorite necklaces from her shop.

Make sure you connect with Mirjam on etsy and facebook.


17 November 2012

DIY No Sew Pillows

This post is written by contributing author Adrienne  Audrey.  

The way you decorate your home is often an expression of your personality and personal style. It's fun to play around with home accessories and experiment with new home decor trends. Unfortunately home accessories like throw pillows can be very expensive. Making some fun pillows yourself is a great way to change up your decor from season to season without breaking the bank. But what if you can't sew or don't own a sewing machine? Not to worry, today tutorial will show you how to make cute throw pillows without a sewing machine! All you need are some cloth napkins and a glue gun!

Materials:
  • Two cloth napkins: The thicker the material the better. You can buy funky patterned cloth napkins for very cheap any where kitchen supplies are sold. You can also get some at your local thrift store or yard sale for a true eco friendly project.
  • Glue gun: Available at your local craft store or craft section of the discount department store. If you are working with children use a low temperature glue gun for safety.
  • Pillow filling, pillow forms or and old pillow: How you fill your pillow is up to you. You can buy stuffing for the pillow or insert an old pillow or pre made pillow insert.

Directions:
1. Lay your two napkins together wrong sides facing in.

2. Apply hot glue along the hem of the napkin and glue the two edges together

3. Continue to glue the napkins together but leave one side open

4. Insert your pillow stuffing or pillow into the pillow case you have made.

5. Glue the final edge together.


Because the cloth napkins are already hemmed there are no raw edges that can fray. 

Obviously, you cannot wash these pillow cases so you may want to choose napkins that are stain resistant. Once you tire of your pillows of they get dirty you should be able to pull them apart and then you can reuse the filling for another pillow or toss the napkins into the wash and reuse them for another project!  


Adrienne Audrey lives in Northern Washington on a farm with her husband and a menagerie of lovable animals. When she’s not blogging at Crafty Little Gnome, Adrienne can be found out playing in the garden, experimenting in the kitchen or working on a new craft project. Adrienne also sells handmade jewelry and accessories in her Etsy shop Adrienne Audrey Jewelry. Connect to Adrienne via twitter or facebook.


15 November 2012

Changing of Habits, Changing of Seasons


This post is written by contributing author Shelly Kerry.

Oh winter! Moving from the East Coast to San Francisco, winter definitely has some different meanings to me. I don’t miss the frigid temperatures, the ice or the snow for that matter and am very content with the manageable SF weather. But I still deal with some of the internal and emotional changes that come with the sun setting earlier. I still spend more time at home getting comfy on my couch and still fight to stay motivated during a time that my body naturally wants to slow down.

Two of my favorite online ladies, Jena and Jen from The Maven Circle spoke this week on maintaining good habits. Our minds must have been aligned because I too had been spending the last few weeks thinking about how the change of seasons can affect all of our good routines – exercise, healthy eating and spending time with friends. It may not matter whether the temperature is 65 or negative 10. There might be emotional attachments that come with the autumn and winter months that call for a change in action.

As we prepare for the winter months, make time to check in with yourself. It is a great habit whether you check in when you exercise, when you wake up in the morning or when you meditate. 
Photo: kanelstrand
Don’t be afraid of maintaining positive conversations with yourself. “How many times did I skip the gym this week?” ”How many hours did I spend creating or working on my projects?” Develop an honest and always kind and forgiving relationship with your thoughts. Being honest allows you to make the necessary changes. On my days off I usually prefer to work out in the later afternoon. However, with the sun setting at 5:30 pm these days I am realizing that I will have to work out earlier or it’s just not going to happen. Is it getting to chilly for your walks? I plan on replacing my afternoon walks with a warming yoga class.

I have very unconventional work hours and tend to stay up very late working. If you find yourself with similar habits maybe join me in my promise to go to bed and wake up one hour earlier. With the sun rising earlier this will give you the extra hour of daylight you might be missing. This is a hard one for me!

Take advantage of the time you want to spend inside. Get crafty, start new projects and fill your house with healthy foods and snacks. Make your home an awesome, comfy place to be during the less motivating months. Don’t let it become a dark and depressing place. Plan a few gatherings for friends and family and spend some time getting your home ready for company.

With staying home in mind, this is a great time to define a motivating and inspiring space in your home just for you. If you share your home with your family, your partner or roommates, you all will be probably spending more time inside. If you are like me, you need a space you can call your own. Even if it is just a small desk in the living room, claim it and make it an inspiring, clutter free zone where you can find a little space.

And lastly get outside! Bundle up and spend at least one day a week meeting friends or family out for coffee or something else fun. Let us all promise to not get trapped by the early evenings and chilly temperatures.

Shelly is the founder of the program Creating Space, Mindful Living – motivating and inspiring people to run their businesses more efficiently. She helps others look at their personal and professional lives and explore what is and isn’t working. As a jewelry designer she has spent many years testing and honing the skills and discipline needed to run your own creative business while still having time for friends, family and fun. She puts her wealth of experience to use in the Creating Space service – healthy living advice to help keep you motivated and make the most out of your already busy schedule. She will help you find both the physical and emotional space so you can pursue your dreams and she’ll always insist there’s time for yourself. You can also find Creating Space on Facebook or contact shelly@creatingspacemindfulliving.com


14 November 2012

In my Studio and a Survey with a Reward

Last week was my 35th birthday. Just a day before it was the 4th anniversary of my grandfather's death. It so happened that the loss of this incredibly intelligent and kind human being will forever be intertwined with my birthday. Life is sometimes way too harsh.

For 4 years now I have been having mixed feelings to the celebration of my birth. But that juxtaposition of life and death made me think about the direction I want to develop my online presence. Those thoughts, combined with a few extremely fruitful talks with close blog friends, added up to the initial push of yet another change on Kanelstrand.

I am constantly searching, researching; doing, redoing; reading and writing... My grandfather taught me that I should never be satisfied with my methods. Because there always is a better way. "Even after you think you have reached your best", he used to say, "don't stop, keep on developing and you will see how much more there is to it."

The Kanelstrand blog headers from its beginning to now

But you see, this whole journey through the land of graphics, blog-making and followers-gathering led me back to the basics of simplicity. I have a vision for the Kanelstrand blog. I see it as a place for quiet contemplation and reconnection with your creativity and subconscious abilities, yes I mean the ones you don't suspect you possess. I see it growing into a hub for simple living ideas involving not only DIYs and repurposing tutorials but also digging deeper behind everyday actions and into the psychology of it all.

One step towards achieving this dream is going totally ad-free. And this is a big step. I'll tell you why.

At the time being, I invest about 300 hours a month (yup, that's about 10 hours every day of the month, no days off) in researching, writing, editing and networking. The ads on the blog provide just a tiny fraction of my monthly financial support. To give you a better view of the situation, the amount of money I make through my generous advertisers is enough for what my family of three spends for 1 week of groceries. 

And here comes a question to you: if I offer you a simplified, less cluttered, ad-free experience that will surely not be affected by any financial partialities, would you be interested in supporting my hard work by paying a modest monthly donation of a sum of your choosing?

For example, if just 2% of all you, who daily enjoy the information on Kanelstrand award my writing efforts with a monthly sum of only $5 it will equal the amount I am now receiving through my advertisers and will set my mind free of financial dependencies and ready for even more rigorous research that will, of course result in more interesting content for you.

Edit: 
Eunique raises a great question in the comments, which I would like to address here. Here is what she says:

I wanted to comment on your survey. I actually had said no about the contributions, but wanted to explain why. It's not that I don't support and applaud you blog. You are amazing. But I also follow about 20 other amazing blogs. And read countless other blogs. If I were to donate to read them all, how would I choose? I couldn't possibly support them all. I know you work hard (300 hours!!!) and well deserve all the support you can get. 

I understand your fear, Eunique. I, myself read about 50 blogs daily and some of them ask for support. The truth is that I cannot afford supporting them all but I DO support the most amazing ones of all, those that speak to me, teach me and expand my creativity, because I really appreciate what they bring to my life. 

Take for example real life. There are so many exquisite shops, and even more are springing up, but I can't buy from them all, right? I do buy from my most favorite though, the ones that give me better service and higher quality, those that cater to human rights, or keep the environment clean, you see where I'm going.

You can answer this question, as well as a few others yourself in the survey. Yes, I compiled a short survey for you because blogging is about you and me together, and I count on your opinion. Your answers will help me determine the direction we are heading. (Hush, don't tell anyone but taking the survey will give you the chance to get a one-time 95% discount to the Kanelstrand etsy shop.)

Please, take a minute to fill out the survey here. This will help me create an even more enjoyable place for all of us. The results of the survey, as well as the winner of the 95% discount to my esty shop will be announced in a week back here.

Thank you!

13 November 2012

DIY: Basic Jewelry-Making

This post is written by contributing author Paige Ronchetti.

I haven't talked about it much here, but I make jewelry for a living. It's not life-changing work like brain surgery or designing a better solar panel, but the skills are surprisingly useful. Really! Designing a whole piece from scratch may be kind of tedious for some people, but basic jewelry skills are so handy. One of the easiest things to do is remove extra/unwanted beads from a piece, which is a great thing to know when you buy pieces secondhand (or get something strange for Christmas).
how to make jewelry

To get started, you just need your piece of jewelry and these two pliers, which are available at craft stores or large websites like Amazon:

how to make jewelry

I'm making over this necklace. I loved the color of the beads, but the dangly teardrops on the bottom were too much for my simple taste.

how to remake a necklace at home


The dangly beads are attached by metal pieces called jump rings, which are extremely common in jewelry-making. To remove the beads, we just need to open the rings.

Take your needle-nose pliers in one hand and your round-nose pliers in the other. Use them to grip the metal. Open the ring by moving one hand toward your body. Don't try to pull the ring sideways or you'll never get it back together if you decide to use it again.

diy jewelry making


When you pull the ring apart, it should look like this:


Just slip the ring off the chain and repeat until all of the beads are gone. Conversely, if you want to add beads to something, you open the ring the same way, slide the bead and chain into the opening, and close the ring by pushing the ends back together. It might take a little practice to line the ends up again, but once you figure it out it's like riding a bike.

In the end, my "new" necklace looked like this:


Ah, much better. And now I have a little pile of beads I can turn into something else! Maybe I'll show you more about that next time... Have you ever tried your hand at jewelry-making? What are some of your favorite tips for making over a piece?

Photographs by Paige Ronchetti.


Paige Ronchetti lives in the Chicago suburbs with her husband. They have no kids and no pets, which gives them a lot of time for eating spicy food and looking for bargains. Paige's blog is Little Nostalgia is a collection of projects and pretty things. There you can find DIY tutorials, home decor inspiration, and affordable fashion ideas. When she is not blogging, Paige is working on her vintage-inspired jewelry lines, Little White Chapel and Oh Nostalgia. Connect to Paige via twitter or pinterest.


12 November 2012

A Portrait of the Artist: Redbird Cottage Art

Meeting passionate people is always a treat to me. Especially when they are artists like Dawn Derman. It only took one look at her hummingbirds to remember them forever. Dawn is a painter with a wonderful light and airy style that you might mistakenly classify as too loose but look closer and you will see the experienced hand of an artist who is in love with nature and has spent a great deal of time observing it. Browse through Dawn's Redbird Cottage Art shop on etsy and you will see what I mean.


Tell us about your background. How did you get acquainted to painting?
My journey as an artist began in working with textiles. I opened my first shop on etsy selling primitive hooked rugs. I took a class in watercolor two years ago and haven't looked back since! I opened my second shop on etsy in 2011 and I have been exhibiting and selling online and in galleries ever since.

You mostly paint birds. What is it in them that attracts you?
My home backs to a pond filled with wildlife and birds. I find so much beauty and inspiration by observing the natural world. I can see different expressions and personalities in the birds and I love to capture that experience. I paint with a loose, expressive style and lots of color. I experience great joy creating and try to bring that sense of life and movement to my art. I have always been attracted to the natural world and feel more at peace in that setting than anywhere else. 
Autumn landscape
Walk us through your creative process. How long does a painting take from start to finish?
I am always thinking about what to paint next – noting color combinations, forms,  the way the light looks – anything that catches my eye. I love to paint for a good chunk of time.  I am not good about starting a painting and then walking away from it.  I want to sit down, start the painting and see where it goes – all the way to the end.  There are times when I look at something the next day and see that it needs one more little thing, but for the most part I stay with a painting until it’s finished. Some days that takes longer than others and  I get completely focused for hours. Maybe that’s why I like to work in smaller sizes. They are easier to complete at one time.

What is your favorite media to work with?
I love working with watercolor... it's very exciting and unpredictable. The water and paints combine in different and unique ways in every painting. Sometimes I am very pleased and sometimes, not so much. 
Rooster art
How much time do you spend marketing your work?
I spend more time than I would like marketing my work. Listing, changing tags, etc. on etsy is quite time consuming. That does not come at all naturally to me so it has been quite a learning process.

Which are your bestsellers?
I think the hummingbirds are probably my best sellers.
hummingbirds
Hummingbirds by Redbird Cottage Art
If you could do one art project, regardless of expenses, what would it be?
I don’t really have a project in mind, I guess I would like to just keep painting everyday and not have to think about selling my work. I’d love to get up every morning and try something new with my watercolors and not worry about coming up with new pieces to sell.

What is your current favorite item by another etsy seller?
I love rustic, handmade jewelry and this piece by Vanessa Faith is my current favorite:

Make sure you connect with Dawn on etsy and facebook.


10 November 2012

Weekend DIY: How To Make Mittens On A String Bunting With Salt Dough

This post is written by contributing authors Vivid Please.

Brrr! What a chill in the air! 
Mittens on a string bunting decoration home christmas autumn cute pom poms bakers twine salt dough project diy tutorial
Winter is one of our favorite times in the year for cozying up in wooly jumpers and indulging in some delicious hot chocolate. I've already got my mittens on a string threaded through my coat and I am ready for the snow! Perhaps it's still a little too early for that outdoors, but we can still sprinkle a little of that magic inside our home to get us in the seasonal spirit...

Let's make some mittens on a string bunting!
 how to make salt dough clay ornament play dough at home diy tutorial

For this project we will be working with salt dough - something me and mum used to make mountains of when I was little. It is amazing! Using only salt, flour and water you can make a dough that's like clay, bakes into a solid and lasts forever if varnished... If you've never heard of it, prepare to save a fortune in crafting supplies!
christmas decoration projects diys for kids
To make salt dough you'll need:
  • salt, 
  • water,
  • flour.
The measurements are:
  • half, 
  • half, 
  • whole. 
For instance, I made a small batch at 250g, 250g and 500g water, which is more than enough for this project! Simply pop it all in a bow and kneed it together until you've got a nice big dough ball. Easy-peasy! 

You can use cookie cutters for this project, but as I didn't have a mitten shaped one I made a simple template out of some thick paper. I then used a sharp knife to cut each piece out; it's a little time consuming but totally worth it if you want some bespoke happiness in your home :D
christmas deco ideas diy tutorial crafts mittens autumn bunting
Once you have all your pieces cut out you can add any decorating you like. I cut in a few little ribbed markings around the wrists of each mitten; simple yet effective! Remember to use a toothpick to put a whole through each piece when you're done - you'll need to do this for hanging. Once these get baked they will rise a little, which is perfect for my mittens as they will look more real!
biscuit cake decoration shapes ideas autumn christmas cookies mittens kids party dinner

As I mentioned, when I was little we used to do this all the time. However, my mum would have me bake all my finished pieces in the oven, which is both time consuming and a bit mean on the environment if you're only making a small amount! So, I am delighted to share that this recipe works just as well in the microwave :) Place your pieces on some parchment paper and heat on full power for around 40 seconds. If you were making something quite large, you'd need 1-2 minutes. Check it at intervals to make sure it doesn't burn.
mittens on string bunting christmas decoration tree ideas crafts tutorials diys projects home decoration

Once they've cooled you they're ready for painting! Here I've used acrylics as that's what I have in the house, but you can use any kind of paint. The salt in the recipe will keep your creation from going moldy for a really really long time, but if you want to keep it for next year we'd recommend varnishing them too. 

When you're happy with how they look, thread them together in pairs. So cute!
mittens on a string bunting idea craft tutorial salt dough homemade handmade christmas gift idea

To make the bunting, I used baking twine for thread as it's perfect for the season. Thread on some white pom poms as little snow balls and hang it onto your wall. Finally, wrap your mittens round the twine in their appropriate places and fall in love with your fabulous new decoration! Adorable :D

We hope you find our tutorial inspiring for the upcoming holiday season! We're already planning to make some more to go around our Christmas tree... It's so cheap and easy to do it would be rude not to!

Enjoy!


Vivid Please are known as Vicky and David when they are not together, but to be fair, that is rarely the case. Forever collecting odd trinkets and pointing at cute dogs, they believe that happiness is found in the little things. Their etsy shop stocks everything from prints and stationery to bags and accessories, everyday life has never seemed so fun! You can keep up with them by following their blog Vivid Please where they share their awesome DIYs, cool design and fashion posts and, of course, lots of snapshots from their world of wonder. Connect with Vivid Please on Twitter and Pinterest


07 November 2012

Razzle Dazzle Me Giveaway

I am so excited that this week's giveaway has to do, once again, with a change of heart! Roslyn LaDuke of Razzle Dazzle Me will surprise you with all kinds of ear cuffs, ear pins and earrings with Swarovski crystals, sterling silver and artistic colored wire, chains, feathers and charms. 

How did she start making jewelry? Here is where the story begins - surrounded by crafty and skilled family Roslyn couldn't pick anything for herself.  Her grandmother was a great seamstress but Roslyn hated sewing. Her mother could crotchet and knit, but these made her tense contrary to expected. Her husband and brother were master woodworkers, but the lathe and saws scared her. Her other brother could paint. She draws like a five year old. 

And that's how it goes until the day Roslyn's husband dragged her to a jewelry class. She was sure she would never get hooked on making jewelry. But one class was all it took. From that day on she started seeing designs in her head and worked hard to create them. 

She comes to you today addicted to making jewelry.

I am sure Roslyn's  passion will affect you and wearing an earring  by Razzle Dazzle Me will inspire you to chase even those dreams you don't suspect having!

Starting today and for one week only Roslyn offers you the chance to win TWO of her signature ear cuffs valued at $30!


The black rooster saddle and grizzly feather ear cuff looks so fashionable on the ear! There is a silver chain to connect the earring and the ear cuff and an antiqued silver feather on each earring and on the ear cuff

The sterling silver ear cuff is enhanced by the gentle sparkle of the two Swarovski crystals. 

This giveaway is open Worldwide until November 14th. To enter it, follow the Rafflecopter widget.

Good luck and don't forget to check Roslyn's video and see her awesome creations on real people!
a Rafflecopter giveaway