30 December 2013

How To Achieve More Without New Year's Resolutions

Traditionally, we fill the last days of the old year with resolutions and highly improbable plans for the new year. We try to promise ourselves brighter future, better selves and impeccable actions.

Those new year's resolutions rarely if ever meet the bright light of day.

Our positivity at the end of the year turns into guilt at the beginning of the new one: guilt that grows into shame, denial and ends up in oblivion a couple of days before the end of the year.

And then again we promise ourselves that we are going to change this time.

Why not try a different attitude this year?

Here is a simple and easy plan for 2014.

Live for today.

Give yourselves the time to go through the past year and appreciate the good moments. Value the lessons you've learned from the bad moments. Be thankful.

And then, just to make sure that you will appreciate everything good that comes to you and not forget it, designate a jar, or a little notebook where you will write down and collect everything you and your family members have achieved through the year.
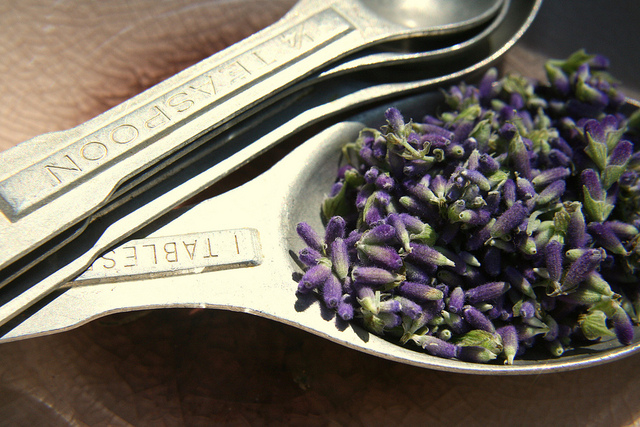
How To Achieve More Without New Year's Resolutions
photo via: strep72


Every time that any of you makes a progress in any sphere of life, write it down in the notebook or put the piece of paper you wrote it on in the jar.

Then make reading the achievements the key moment in the last days of the next year.

The simple act of going through your successful moments (most of which you will have forgotten by the end of the year) will lift your spirit and will show you that you haven't wasted time. It will give you wings and will inspire you to be the better you because you will clearly see how much you have progressed.
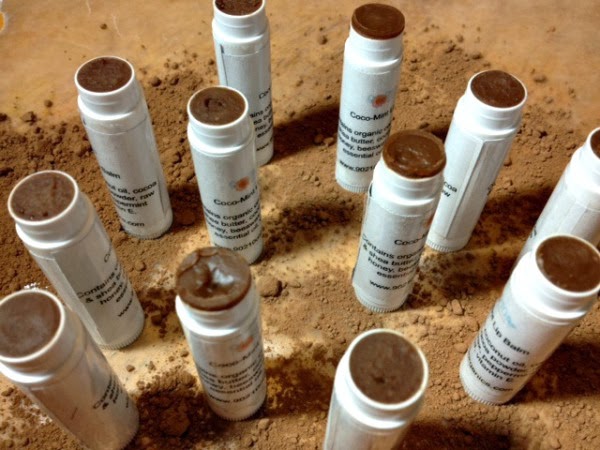

How To Achieve More Without New Year's Resolutions
photo via: coconino

Promise me that you will fill this jar with deeds worth remembering.

Promise me you'll try.

I will too.

And next year we'll exchange the self-respect we've gained.

Deal?


27 December 2013

8 DIY Hair Treatments for Dry, Brittle and Damaged Hair

Winter is the season for dry hair. Even if it is lively and healthy in all other seasons, come winter and more often than not hair gets dry, brittle and damaged. The reasons for this include the dry air indoors, the cold air outdoors, the hot showers we tend to take, our winter diet, which features decreased vitamin intake...

To keep your hair from getting dry and brittle, you can DIY different natural hair masks.

8 DIY Treatments for dry, brittle and damaged hair
Photo: marin via freedigitalphotos.com

Handmade egg shampoo
  • 1 egg yolk
  • 1 teaspoon honey
  • 1 tablespoon olive oil
  • the juice of 1/2 lemon

Whisk the egg yolk very well, add the honey, olive oil and lemon juice. Mix energetically to blend. Apply to wet hair by massaging thoroughly into the scalp. Cover the hair. Let it stay for minimum 10 minutes -- the longer, the better. Rinse with lukewarm water. Read more about the recipe.

Birch and lavender hair lotion
  • 2 teaspoons dried lavender blossoms,
  • 2 teaspoons dried birch leaves,
  • 2 tablespoons apple cider vinegar,
  • a couple drops of lavender oil.

Put the dry herbs in a clean glass bottle and pour the vinegar. Close the bottle and leave it away from direct sunlight. After 1 week sift the mixture and add lavender oil. Before use add 2 parts of water to 1 part of herbal mixture and massage well into the scalp. Do not rinse. Read more about the recipe.

Egg and castor oil mask
  • 1 egg yolk
  • 1 tablespoon castor oil

Whisk the egg yolk very well,  add the castor oil. Rub the mixture well in the roots of your hair. Cover your hair with a towel (to keep it warm) and stay with it for about 2 - 3 hours. Wash your hair with a natural shampoo.

Honey and olive oil mask
  • 3,50 oz (100 g)  honey
  • 0,10 pt (50 ml) olive oil
Mix the honey and olive oil until they form a thick paste. Rub in the roots of already washed hair. Let stay for 30 minutes and rinse with lukewarm water.

Egg, olive oil and lemon shampoo
  • 2 egg yolks
  • 10 drops olive oil
  • 10 drops lemon juice
  • 5 drops glycerin
 Mix all the ingredients well. Wash your hair with this shampoo and lukewarm water.

Avocado mask
  • 1/2 avocado
  • 1 egg yolk
Blend the avocado and egg yolk in a blender. Apply to your hair by massaging well. Wrap your hair in a towel or shower cap and wait 20 minutes. Rinse with lukewarm water. Read more about the recipe.

Pumpkin and honey mask
  • 1 cup pumpkin puree
  • 1 - 2 tablespoons honey
Mix well to blend and massage on your hair and scalp. Cover with a  shower cap for 20 minutes and rinse. Read more about the recipe.

Lavender and coconut mask

  • 1 tablespoon lavender oil
  • 1 tablespoon coconut milk
Massage the mixture into your dry hair before sleep and rinse off in the morning. Read more about the recipe.

How is your hair feeling this winter? Have you used any of these masks? Let us know in the comments.


20 December 2013

Healthy Homemade Nutella Recipe (Vegan)

I have almost stopped buying sweets. Not because I don't like them but because I am disgusted by the amount of unhealthy, chemically-enhanced ingredients they contain, and of course the sweeteners in all forms. With commercial sweets and ice-cream I said good bye to Nutella as well.

Why? Because although Nutella is marketed as "hazelnut cream", its main ingredients are sugar and palm oil, followed by hazelnut, cocoa solids, and skimmed milk. Actually Nutella is 55% sugar! In the United States, Nutella contains soy products. Read the correct list of Nutella ingredients. About half of the calories in Nutella come from fat (11 g in a 37 g serving, or 99 kcal out of 200 kcal) and about 40% of the calories come from sugar (20 g, 80 kcal).

I have already reduced to a minimum the use of refined white sugar but palm oil is so hard to avoid in commercial products nowadays. Not only is palm oil proven to increase blood cholesterol levels and to contribute to heart disease but according to Climate Mama it also contributes to climate change. Often, the agricultural practices used to produce palm oil in Indonesia and Malaysia (where 80% of palm oil is produced) have a negative impact not only on the wildlife, and our environment but also on our increasingly limited “carbon budget.”

Being a health- and environmentally conscious chocolate lover I got super excited when I found the recipe for homemade Nutella by the Coconut Mama and hurried to the market to buy some hazelnuts and start blending.

While Nutella provides very little in the way of good nutrition (not much protein, fiber, vitamins, minerals – the nutrients we are lacking) this homemade sugar-free version is not just vegan, it's healthy.

Healthy Homemade Nutella (sugarless and vegan)

So, here is the (slightly adjusted) recipe, accompanied by step-by-step instructions for a healthy guilt-free "Nutella" indulgence!

Ingredients:
  • 2 cups hazelnuts
  • 3 tablespoons coconut oil
  • 6 tablespoons unsweetened cocoa powder
  • 2/3 cup honey
  • 1/2 cup rice milk
  • 1/8 teaspoon salt
Yields about 1,1 lb (500 g) of delicious homemade Nutella.

Directions:

1. Preheat the oven to 350°F (176°C).

2. Spread the hazelnuts in a single layer on a baking sheet.


3. Toast the hazelnuts in the oven for about 12 minutes, until they get slightly  brown and the skins are blistered a little.

Healthy Homemade Nutella (sugarless and vegan)

4. Wrap them in a kitchen towel and rub vigorously to remove as much loose skin as possible. Some skin will cling to the nuts but that is ok. Let cool completely and put in a food processor.

Healthy Homemade Nutella (sugarless and vegan)

5. Blend the hazelnuts until they form nut butter.
Healthy Homemade Nutella (sugarless and vegan)
Not ready.

Healthy Homemade Nutella (sugarless and vegan)
Not ready yet.

Healthy Homemade Nutella (sugarless and vegan)
Close.

Healthy Homemade Nutella (sugarless and vegan)
Perfect!


6. Now add all the other ingredients and only half of the required milk.

Healthy Homemade Nutella (sugarless and vegan)

7. Blend again. If you like the consistency, leave it like that, if not just pour the rest of the milk.

Healthy Homemade Nutella (sugarless and vegan)


And voilà! You have a rich nutty, chocolatey treat that is also healthy!

Healthy Homemade Nutella (sugarless and vegan)


References: 
http://en.wikipedia.org/wiki/Palm_oil#Health
http://climatemama.com/blog/6595
http://foodwatch.com.au/blog/additives-and-labels/item/nutella-the-full-correct-list-of-ingredients.html

This post was shared here:
Real Food Wednesdays
Raising Homemakers 
Motivation Monday 
Sweet Sharing Monday
Plant-Based Potluck Party

18 December 2013

Mandarin Orange Peel Garland

It so happened that I grew up with citrus fruits only in wintertime. So now I associate Christmas with the smell of mandarin oranges and oranges. That is why, when I came across Casey's post about making orange peel garlands I quickly experimented with mandarin oranges and made my own garland.

Making a mandarin orange peel garland is an easy project appropriate for young kids, so keep that in mind when you start decorating your house and don't forget to involve them!
How to make mandarin orange peel garland

Supplies:
  • several middle sized mandarin oranges, or clementines
  • cookie cutters of your choice
  • needle and thread

Method:

Score the mandarins and then divide in half so that the peel could come off easily.

How to make mandarin orange peel garland


Make sure you place the cookie cutter on the soft inner side of the peel for ease of cutting.

How to make mandarin orange peel garland

With the cookie cutters I used I made 2 ornaments out of every mandarin orange.

Then, while the ornaments are still soft use a needle and string all of the ornaments together.

How to make mandarin orange peel garland

Now is the time to press them with a heavy book for about a day to keep them straight or you can hang the garland as is but then prepare for curly points.

How to make mandarin orange peel garland

The orange color and the magnificent citrus smell will add so much to your holiday.

Enjoy!


16 December 2013

How to Make Paper Stars

This is a paper star pattern that, since my daughter taught me to make, has become an annual tradition in our home. We make tens of white paper stars in early winter and hang them on thin white thread around the house. The paper stars carry the festive spirit throughout the darkest months of the year and often we don't feel like taking them down in spring. But that's quite alright because these beautiful festive paper stars look good in every season.
How to make beautiful white paper stars and hang them around your house

Supplies:
  • white A4 paper sheets
  • scissors or a knife
  • glue or transparent tape
  • thin white thread
  • paper punch

You can make one 8,3 (21 cm) star or two 5,5 inch (14 cm) stars out of a single A4 paper sheet.

Method:

Get an A4 paper sheet. Cut in half along the long side. Fold the resulting pieces in half and cut. Then in half again and cut. You will use these pieces of paper for the 21 cm star. To make the smaller one, cut the paper in half once again.

How to make beautiful white paper stars and hang them around your house


Follow the folds in the picture to get the resulting piece. You need 8 of them for a perfect star.

How to make beautiful white paper stars and hang them around your house

Arrange all 8 pieces by lining them along the middle fold, just like on the next  picture.

How to make beautiful white paper stars and hang them around your house

You can glue the pieces together or you can use a transparent tape (as I did).

Punch a hole at the end of two opposing corners and pass the thread, so you can hang the stars, one under the other.

How to make beautiful white paper stars and hang them around your house

Now you have a beautiful vertical garland of paper stars that will dance to the movement of air in the room.

This is a fun project for the whole family!

Tip: if you don't have an A4 sheet the stars will be slightly different but don't worry, they will be geometrically perfect!

13 December 2013

The Most Effective Immune Booster Drinks

Welcome to flu season! Apart from the flu itself, the high chance of catching a cold in the winter is reason enough to look for a cheap and effective way to boost your immune system.


If, like me, you are looking for ways to be healthy without medicines and with the help of Mother Nature (and a blender/juicer) you can now make the cheapest immune booster drinks and add daily variations to suit your taste.


Photo: Jeroen van Oostrom via FreeDigitalPhotos.net

What's the secret ingredient in an immune booster drink?

The most important thing to remember is that foods rich in carotenoids boost your immune system. Orange and yellow fruits and vegetables have high vitamin A activity because of the carotenoids they contain. The deeper the color of the fruit or vegetable the higher the concentration of carotenoids. Green leafy vegetables such as broccoli, spinach, and asparagus also contain large amounts of carotenoids.

Carotenoids are a group of A vitamins that includes beta-carotene, lycopene and lutein, all of which boost the immune function, promote healthy skin and bones, and fight against serious diseases, including lung cancer, heart disease, Alzheimer's disease, and Parkinson's disease.


Foods rich in carotenoids
  • Carrots
  • Tomatoes
  • Pumpkin
  • Melon
  • Watermelon
  • Apricots
  • Spinach 
  • Broccoli
  • Potatoes
  • Asparagus
It is best to eat 9 to 10 servings daily of the above mentioned fruits and vegetables high in caretonoids, but if you prefer you can juice or blend them by themselves or in any given combination. Let your imagination run wild, there is no chance of making a mistake.

DISCLAIMER: Please note that this information is only meant as a guideline and in no way replaces the advice or treatment provided by your medical practitioner. It is always good to seek the advice of your physician, homeopath, naturopath, or herbalist for professional advice in any matter related to your health. This article is for information purposes only.

11 December 2013

Handmade Bath and Beauty Gifts I Wish to Give

This Christmas, more than ever I wish to not succumb to the holiday buying fever and come up with original handmade gifts for my family. To be honest, I've managed perfectly fine so far.

And because I am getting overly-excited about making my own bath and beauty products, here is my ultimate list of handmade goodies I wish to be able to complete before Christmas and gift to my family.

Rosemary Shampoo Bar

Because I love no-pooing and I have turned my family into no-pooers as well. This rosemary shampoo bar will be a treat!


Marshmallow Root Herbal Shampoo

The Marshmallow root shampoo is perfect for rehydrating hair that gets dry easily in winter.


Birch And Lavender Nourishing Hair Lotion

Because birch strengthens and nourishes your hair and lavender  has anti-fungal properties. The birch and lavender nourishing hair lotion will also fight dandruff.

Photo: Elizabeth Weller

Handmade Probiotic Deodorant

I wouldn't gift a regular deodorant for the world now that I know how toxic they are. What better way to get my loved ones on the healthy underarm path than by making a probiotic deodorant for them!


Coco-Mint Lip Balm

Knowing how hard it is to find a really healthy lip balm I prefer making my own. Here's to my first try! I hope this recipe for coco-mint lip balm will work.


Aches and Pains Balm

The aches and pains balm will be the most sought-after gift for members of my family aged 60+. Can't wait to see the effects.


Sugar Face Scrub

I still haven't met a person who doesn't like the sugar face scrub. So, I am definitely making it.

Sugar crystals by Dan Tentler

Homemade Laundry Detergent


I was terrified when I learned how much we polute the world oceans with the laundry detergents we use. So, why not educate my family and show them that the homemade laundry detergent does the job even better than the commercially produced one.


Homemade Toothpaste


This is a recipe for handmade toothpaste I have been promoting anywhere I can because I love how simple and yet effective it is.


Madagascar Black Pepper Soap for Men


Here is a treat for the male part of the family -- Madagascar Black Pepper Soap.


Beeswax Candles

And in the end, let's make a beeswax candle or two to ensure that the holiday spirit will linger.


What handmade gifts are your working on this holiday season?

09 December 2013

4 Natural Remedies Against Dandruff

Although a very common condition, dandruff is by no means pleasant. You can choose to live with it or you may look into its causes and try to prevent them.

Dandruff can be dry or oily.

Dry dandruff often results from incorrect brushing/combing, reveals bad skin circulation, or is the effect of the use of alkaline hair products that disrupt the natural pH of the hair and scalp.

Ivory white flakes of dandruff can signify high activity of the sebaceous glands or lack of nutrients due to poor diet. This type of dandruff could also be a sign of a fungal infection.

There are plenty of anti-dandruff shampoos on the market but what they do is load your hair and scalp with an array of chemicals and rarely if ever actually treat dandruff. On the contrary, they will damage your hair and strip the protective oils that prevent dandruff.

If, like me, you want to keep your hair as chemical-free as possible and are willing to try nature's way, here are several natural remedies that will help you effectively treat dandruff.

Photo: stockimages on FreeDigitalPhotos.net

But before that, a few steps you can take to prevent dandruff.

How to prevent dandruff
  • Brush your hair thoroughly each day. Make sure you use a hairbrush with natural bristles.
  • Massage your scalp with the tip of your fingers thoroughly, as if you are washing your hair, pull your hair gently to increase blood circulation.
  • Avoid using strong hair dyes and perfumes.
  • Increase the intake of Vitamin A, which can be found in fish oil, milk, cream, egg yolk, liver.
  • Increase the intake of zink, which is naturally found fish, lamb, chicken, spinach, beans, mushrooms, pumpkin seeds, nuts, cocoa, 
  • Dandruff can be a symptom of food allergies, so check if you have any.
  • Replace your daily dose of citrus fruits and juices with bananas, avocado, raw and steamed vegetables.
  • Reduce sugary foods.
  • Wash your hair with lukewarm water, as hot water can strip the hair of the natural oils that prevent dandruff.
  • Blow-drying can dry the scalp, causing itch and dandruff. Read more about why I stopped blow-drying and maybe you will too. If you must blow-dry, hold the dryer at least 10 inches from your scalp.

Natural remedies against dandruff

Tip: Before starting any anti-dandruff procedure make sure that your comb/ hair brush is disinfected, your towel is clean and your hair is washed and dried.

To disinfect your comb or brush make a one-to-one mixture of water and lemon juice, and soak them overnight.

Rosemary
Rosemary (Rosmarinus officinalis) relieves dryness and nourishes the skin. It is especially good for treating dandruff because of its anti-fungal properties. Rosemary is also known to strengthen your hair, promote hair growth and deter gray hair.
  • Add 1.06 oz (30 g) of fresh or dry rosemary to 1.06 pt (500 ml) boiling water and let stay for 24 hours. Sift and rinse your hair. Repeat daily for 2 weeks or until dandruff is gone.
  • Boil 0.7 oz (20 g) rosemary leaves in 2.11 pt (1 l) water. Sift and cool. Wash your hair with the rosemary water. Make sure you massage it well into the scalp.

Stinging nettle
Stinging nettle (Urtica dioica, Urtica urens) is used for fortifying hair, boosting hair growth and preventing hair loss. It is known as one of the most effective treatments for oily hair and dandruff.
  • Cut 7 oz (200 g) fresh nettle leaves and boil for 15 minutes in 2.11 pt (1 l) water. Set aside for 2 hours. Sift. Massage your scalp gently twice a day. Store in a fridge for no more than 3 days and warm up before use.

Burdock root
The roots of Burdock (Arctium) are often used as a scalp treatment to combat hair loss, improve hair strength, shine and body. It is also used  against dandruff and scalp itching, promote healing of skin and scalp conditions. It is rich in phytosterols and essential fatty acid, nutrients required for healthy scalp and natural hair growth.
  • Soak 0.53 oz (15 g) burdock root and 0.53 oz (15 g) rosemary with 1.06 pt (500 ml) boiling water. Sift after half an hour and massage the roots of the hair.
  • Mix 0.7 oz (20 g) burdock roots, 0.7 oz (20 g) camomile, 0.7 oz (20 g) walnut leaves, 0.35 oz (10 g) nettle leaves, 0.7 oz (20 g) nettle root. Soak 3 tablespoons of the mixture in  2.11 pt (1 l) lukewarm water and warm up for 30 minutes. Massage into the scalp. The mixture is also very effective against hair loss.

Wine vinegar
Vinegar works well in treating dandruff because it is high in potassium and natural enzymes that help protect the scalp. It is also know to fight fungi and helps reduce fatty acids in the organism.
  • Mix 2 teacups wine vinegar with 2 teacups water and 1 teacup fresh or dry nettle leaves. Boil for 10 minutes. Sift and cool. Massage your scalp twice a day.

Tip: Make sure you use white wine vinegar if your hair is blond because red wine vinegar will darken it.

Now it's your turn: What kind of natural home remedies have you found useful for treating dandruff?

22 November 2013

Be Grateful.

Thornton Wilder, illustration, Weird Amiga, gratitude quotes, we can only be said to be alive,


Anabel Bouza insists there's powerful magic in the action of creating something out of a vague vision, a chill of inspiration. She is an illustrator with a passion for nature, paper manipulation, and pointing her camera at everything. Her appreciation for simplicity dates back to a former life in Cuba where she refined the ability to see the alternative uses of common objects, and the enchanting side of things. You can find her blogging as Weird Amiga, hard at work in her sunny studio, or staring at things as if looking at them for the first time. Connect to Anabel via facebook and twitter. Read all posts by Anabel. 


25 October 2013

DIY: Simple Embroidery Patterns.

The holiday season is approaching at full speed, and as the number of people on my gift list increases, I've vowed to give myself enough time to make presents for everybody this year. After all, gifts are all the more personal when they are handmade, right?

I am excited about this month's theme here at Kanelstrand (Work with Your Hands) and I thought it would be fitting to share something that will help you get a little handmade project started. You can always turn the finished piece into a present to give away during the holidays!


I have always found embroidering to be very soothing. I love contemplating a perfectly smooth piece of cloth stretched between embroidery hoops, the tiny boom of the needle when it pierces the tense fabric… I love cuddling up with a small embroidery project and letting the rhythm of the task take me away.

You can download the patterns here. They are about 4.5" high and print on a standard 8.5x11 sheet (just reduce or enlarge them to suit your project).

They can be interpreted in many ways. Here are some of my own ideas, so far:

The Hut

• Use orange & black to turn it into a folkish, spooky house. I was a bit inspired by Baba Yaga's hut, so you can run with that—pardon my pun!
• Complete it using Fall colors: gradations of orange, brown, burgundy...
• Use cool grays for a wintery, snowy variation.
• Approach it as an appliqué. Layer the scalloped skirt with little pieces of fabric to make it three-dimensional, for example.

The Flower

• Embroider along the lines, without filling in the spaces.
• Fill it up, crewel style.
• Use gradations of green throughout, to emphasize foliage.
• Differentiate stem, leaves, and blossom by assigning each its own color.
• Add embellishments, like tiny beads.

They can be hung as wall decorations (keep that in mind when choosing the hoop if you'll be using it as a frame)
Use them to beautify a plain fabric case, scented sachets, or a tote bag.
Don't forget to play with the background as well! These will probably look great on black fabric. 

Just spend some time with these little patterns and tons of ideas will pop up in your mind. It's such a fun process!

I confess that even though I enjoy embroidering, I don't know a whole lot of stitches & techniques, so share your pictures! We're dying to see what you—master embroiderers of the world—come up with.


Have fun!


23 October 2013

A Simplifier on the Road: More Street Art in Oslo

It seems like I see the streets of Oslo with new eyes, enhanced and re-focused by Bulgaria. I am excited that while we are finishing up with our tasks here and finishing decluttering our belongings we still have time to marvel at the world outside.

Beauty can be found not only in Nature. even though cities are considered the root source of most modern vices I know that if you want to you can stand in awe like a little child in front of details that never existed for other people. 

That is why I would like to share with you some more street art in Oslo, as part of our Trans-European Expedition. 

More Street Art in Oslo

More Street Art in Oslo

More Street Art in Oslo

More Street Art in Oslo

More Street Art in Oslo


21 October 2013

A Simplifier on the Road: Street Art in Oslo

The mysterious beauty of Bulgaria unlocked my attraction to street art and here I am back to Norway, noticing for the first time ever the incredible street art along the streets of Oslo. The grey walls seem to have changed dress just like the trees, living through an eternal autumn thanks to unknown artists.

Enjoy.

Street Art in Oslo

Street Art in Oslo

Street Art in Oslo

Street Art in Oslo

Street Art in Oslo