I've been spending much of my time lately baking (because I'm a baking addict but don't tell anyone) and experimenting with tastes and textures. I've been baking so much actually, that I thought of starting a separate Kanelstrand blog to journal my experiments but I doubt I would be able to keep up with both blogs, so I hope you're up for some sweet or salty healthy baking from time to time.
Today, I'm presenting whole wheat apple muffins that are very easy to make. I found the recipe on The Goodie Plate a couple of hours before a friend was about to come on a visit and so I set off preparing them.
In any other situation I would have tried to turn them into vegan whole wheat muffins but this time I decided to stick to the original recipe. Well, sticking to one is very figurative in my case because I never am able to... but I guess it's the same with you if you love to bake and add your personal touch.
So here goes the recipe with slight adjustments:
Whole Wheat Apple Muffins makes 12 muffins Ingredients:
Batter:
2 cups whole wheat flour 1 tsp baking powder 1 tsp baking soda 1/4 tsp salt 1/2 cup melted butter 1 cup plain yogurt 1/4 cup granulated sugar 1/4 cup dark brown sugar 1 large egg 2 apples, diced
To sprinkle:
2 tbsp brown sugar
1 tbsp soft butter
1 tsp cocoa powder
2 tbsp diced walnuts
1. In a large bowl beat the egg with the granulated and the brown sugar.
2. Add the melted butter and mix well.
3. Add the baking soda to the yogurt and add the mixture to the egg.
4. In another bowl combine the flour, salt and baking powder, then add to the wet mixture. Mix just until the flour gets incorporated. Do not over mix.
5. Add the diced apples to the batter and mix until you incorporate them.
6. Oil your muffin tin and pour the batter. 7. To make the sprinkle just mix all the ingredients and sprinkle on top before baking. 8. Bake at 350° F (180° C) for about 30 min until they become golden brown and an inserted wooden skewer comes out clean.
Remove them from the hot tin and place them on a plate. Let them cool for 5 minutes and enjoy!
I only recently discovered onion in bread and I kid you not, every
time I incorporate it in a recipe, it's a mind-blowing success.
So,
when last night I took a dozen of these bread rolls to a friend's
party, everyone quickly forgot their reasons for being on a diet and the
tiny fluffy rolls were the first to disappear from the table.
For this recipe I use equal parts whole wheat and white flour but if you prefer you can make it only with white flour of course.
Onion and Olives Vegan Bread Rolls makes 8 medium size or 16 small size rolls Ingredients
Dough:
250 g whole wheat flour
250 g white flour
250 ml lukewarm water
dry yeast (for 500 g flour)
2 tsp sugar
2 tsp salt
2 tbsp olive oil
Additions:
1 large onion, finely diced
2 tbsp olive oil
1/2 cup diced black olives
1 tsp oregano
cumin seeds for decoration
1. Place the yeast, sugar and 100 ml lukewarm water in a bowl and mix with a wooden spoon. Let rise for about 15 minutes.
2. Sauté the onions in olive oil until golden brown and add a pinch of salt. Let cool.
3. In a medium-sized bowl combine both flours, oregano and salt. 4. In a large bowl pour the yeast mixture, the rest of the water and 1 tbsp olive oil.
5. Carefully start adding the flour and mix with a wooden spoon.
6. Stir in onion, olives and remaining flour (a bit at a time) until a soft dough forms.
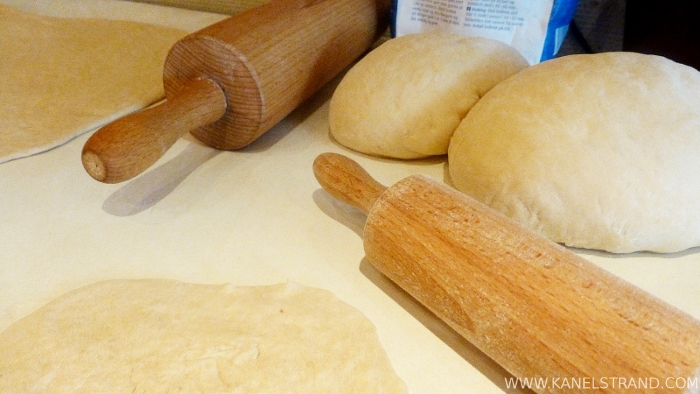
7. On a floured surface, knead dough until smooth and elastic (about 10 minutes) adding more flour to prevent sticking.
8.
Clean and lightly oil your mixing bowl and put the dough back into it.
Cover with a damp tea towel or lightly oiled cling film and set it aside
to prove. This gives the yeast time to work. Let prove for about 1 -
1.5 hr or the dough is double in size.
9. Divide dough into 8/16 equal pieces and form balls.
10. Place rolls on prepared baking sheet, sprinkle with cumin seeds and cover with damp towel.
11. Allow 1 hour for rolls to double in size.
12. Preheat oven to 180°C.
13. Bake until golden brown, about 30 minutes.
And that's it. Can you smell them already?
What is your favorite bread rolls recipe? Share it in the comments for everyone to try.
I grew up on wheat bread -- warm, soft, crispy crusted and incredibly delicious. We called it "white bread" as opposed to the black one -- the rye bread that my grandfather who had diabetes used to eat.
When I started my own family and entered the world of bread baking little did I know that this was a step to simple living but by creating food as essential as bread from scratch I intuitively felt independent, grown-up and free.
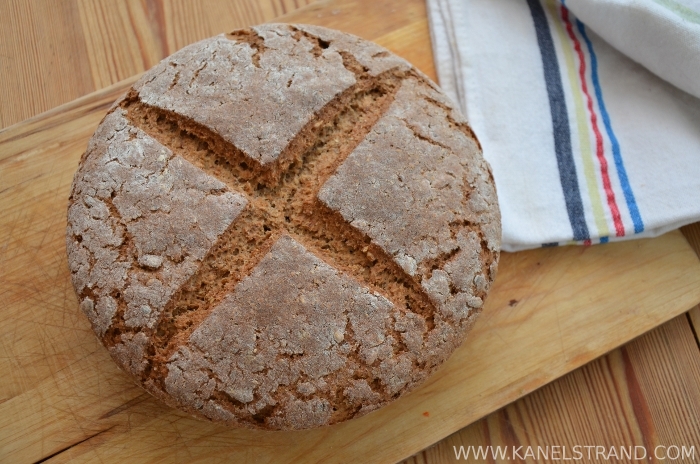
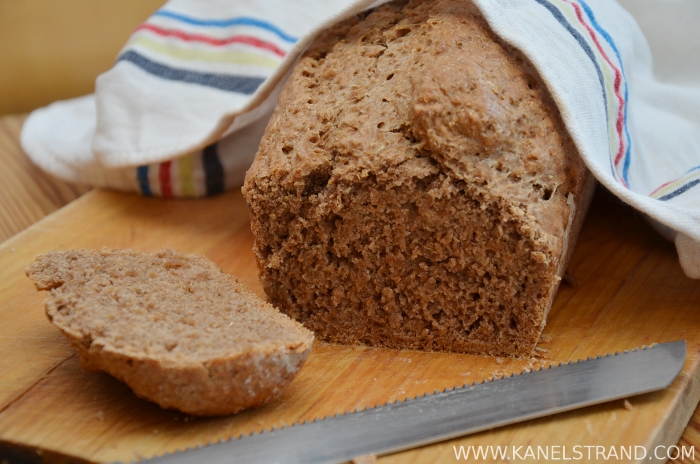
7 years into the journey, my strictly wheat flour bread repertoire has been met with applause but today I want to share with you the latest baked favorite in our household -- the most delicious and rich rye bread recipe that I made up myself.
It is appropriate for those of you who have never even baked bread because it is so easy. With rye you don't have any of the difficulties you will meet in wheat baking.
Rye bread is naturally more wet and doesn't rise as much as "white bread" but with some additions you can turn it into a hearty and healthy meal!
For this recipe I also used a little bit of barley and wheat flours. We don't have any gluten problems at home and I believe that moderation is key to health, so they shouldn't be a problem in the proportions used. But if you follow a gluten-free diet you can substitute them with any other gluten-free flours.
Confession: I tend to use recipes for general ideas and usually change half of them in the process of cooking. I encourage you to do the same and not stick 100% to any recipe but personalize it according to your taste and needs. The Most Delicious Rye Bread Produces two middle sized loaves
3 cups rye flour (coarsely ground)
1 cup barley flour
1 cup wheat flour
1 cup rolled oats
1/3 cup flax seed (crushed)
2/3 sunflower seeds
1 2/3 cups water
1 cup boiling water
3 tablespoons honey
3 tablespoons sugar
1 tablespoon salt
1 tablespoon unsweetened cacao
yeast for 2 kg (4,50lb) flour, this is roughly double the actual weight of the ingredients.
Start by pouring 1 cup of boiling water over the rolled oats, add 3 tablespoons honey and leave to soak for about 15 minutes or until all the water is absorbed.
Dilute the yeast together with the sugar in 1 2/3 cups water. Let rise for 15 minutes. I always do this regardless of what kind of yeast I use, just to check whether it is active.
In a large bowl combine the flours, salt, cacao, the flax seed and the sunflower seeds. Mix well. Make a well in the center and transfer the rolled oats. Pour the risen yeast.
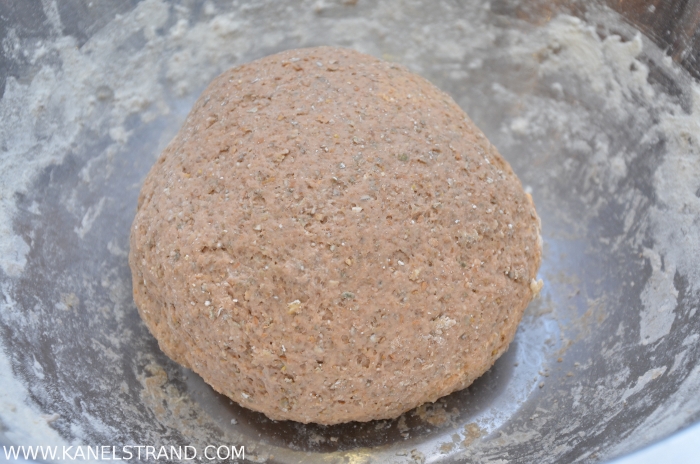
It's time to get your hands dirty. First try to break the oats (they should look like a stiff paste) and then start working the flour into the liquid center. Continue until you have a sticky but manageable dough.
In the adventurous baking spirit I would advise you to decide for yourself whether the dough is hard enough for your taste. It shouldn't be rock hard and it shouldn't be runny either. You might need to add some more flour or water.
Place the dough in lightly oiled clean bowl, grease on top, cover and let rise for about an hour in a warm place. Knead a little bit more and form into a loaf.
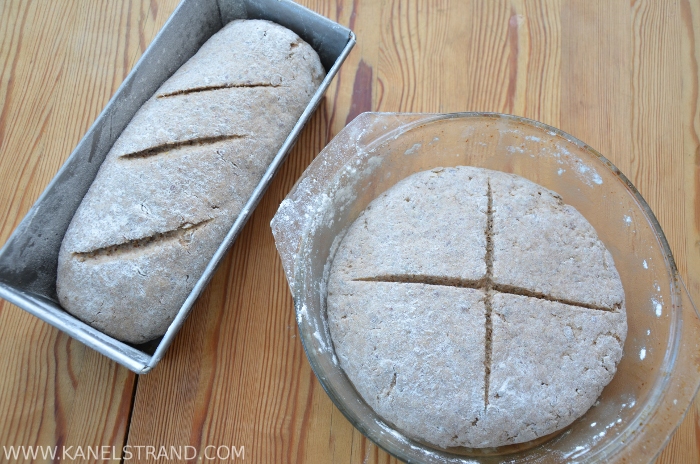
Transfer to a greased form (or two in my case). Make a decorative cut and let rise again for about 30 minutes.
This is how my loaves looked before rising.
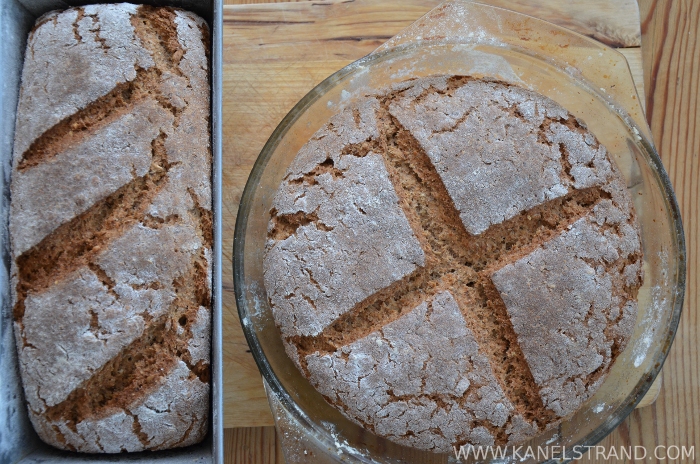
Brush top with water and bake in a preheated oven at 180 °C (356 °F) for 1 hour or until the bread sounds hollow when you tap it.
You should wait for 24 hours before you eat this incredibly delicious bread. In fact, the longer it stays the tastier it becomes.
I love eating it for breakfast with a swipe of butter, a slice of cheese and a cucumber, salad or spinach leaves for freshness.
Mmm, my mouth is watering as I write, I'd better start baking my next batch!
Now it's your turn. What is your favorite rye bread recipe? If you haven't baked so far what could make you try?
This post is part of Eat Healthier month on Kanelstrand. Read the rest of the posts here and join in the discussions, we'd love to know what you think!
When we first met, my husband didn't even dream of me baking bread. I was that busy young woman too high in the professional hierarchy for my age that no one could picture wearing an apron.
The truth is that I was brought up by my mother and grandmother to respect slow food and cooking from scratch. In fact, I don't remember eating any processed or fast food well until my 20s.
My fascination with bread baking has always been active but although I spent long hours by my mother's side in the kitchen I never really felt myself ready to knead until I moved away from home.
For me, the pride to produce something as basic and as important as bread is incomparable to anything. But there is more to baking bread at home than ego. Kneading the dough by hand one transports her thoughts and emotions to the bread, making positivity and inspiration contagious. With this comes also a great responsibility -- to actually be positive while baking, to handle the dough lovingly, with warmth and care. Such a wonderful exercise for the spirit, don't you think?
Now is the time to mention that I don't use a bread machine exactly because I want to keep the connection with bread. I want to feed my family straight from my heart and I cannot let a machine do my job.
I have been baking my own bread for more than 10 years now and to those of you who have been afraid to try I can say, go ahead! I wont lie to you and say it is simple. But it is extremely satisfying and de-stressing.
Maybe your first loaf will not be perfect. You might even ruin it but taking the first step will open up a new road for you that is not only leading you to better health but to a whole universe of new knowledge and possibility to communicate with your inner self.
Stay tuned for some outstanding bread recipes that I will be sharing this month.
Now it's your turn - do you bake bread? How was your first time? Do you prefer a bread machine or your own bare hands?
This post is part of Eat Healthier month on Kanelstrand. Please, join in the discussion, we'd love to know what you think!
“If thou tastest a crust of bread, thou tastest all the stars and all the heavens.” - Robert Browning
I must confess that I still haven't let you in on one of my passions and not because it is so simple and mundane but because I've been trying to keep it to myself, this love for baking of mine.
A house in which the stove is cold is not a home
My grandmother is known for saying that a house in which the stove is cold is not a home. She, as every grandmother in the world is the best cook you would meet. From salads to rabbit stews, she can do it all, no complaints, no whimpering, no failures. Grandma learned from her mother to bake. And, my God, she bakes the most amazing breads.
I remember once when I was in my early twenties she even pretended that I had baked a certain bread in front of the friends that have come to the Sunday dinner, while I had in fact just helped. I will never forget the shame I felt when they asked me about the proportions. At the time I had spent a lifetime looking at her baking - in the kitchen around her every time, helping. But I had never actually performed the whole ritual by myself so of course, I couldn't repeat neither the ingredients, nor the proportions. Thankfully, my obvious lack of knowledge went unnoticed but that day I promised myself to start baking.
The secret of life
So when several years later I started my own family, the urge to make bread quickly grew unbearable and I began with the experiments. The first breads were hard, thick and bland but my husband gracefully praised them and I am so thankful for his patience which helped me develop not only my baking but my creativity as well. Cakes, cookies, muffins, pies, breads, scones, you name it, I went through it all with the passion of a young bride who had grown up with the belief that you don't hold the secret of life if you cannot bake your own bread.
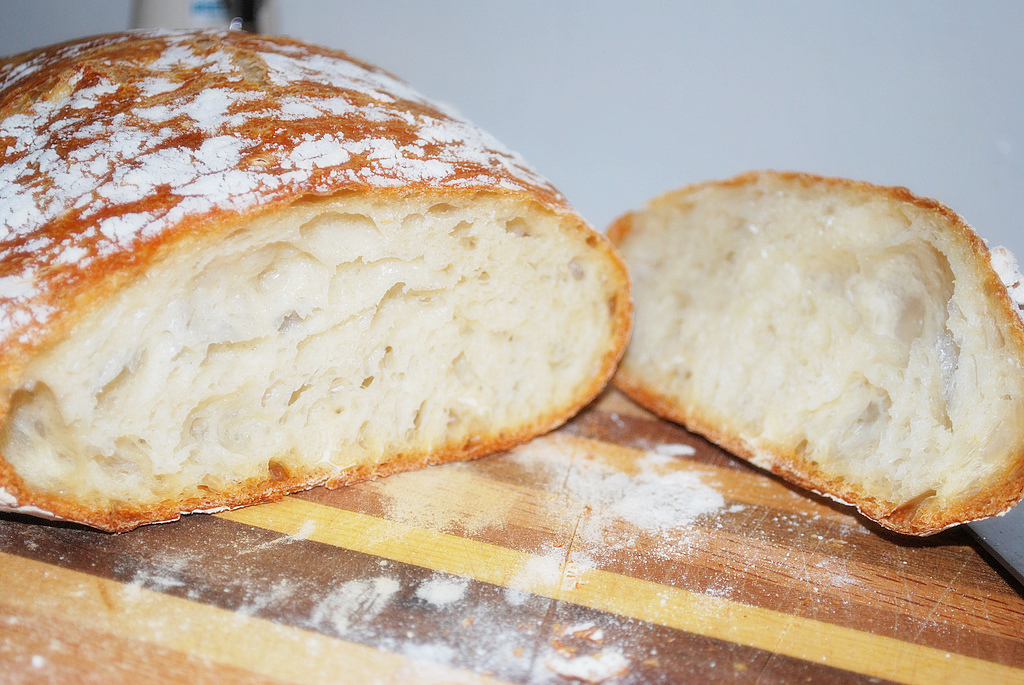
In these times of exploration I stumbled upon a fabulous recipe which will make even a beginner look like a pro baker. It is the bread from my childhood and has the specific aroma and the amazing crust that you can get only in a small village bakery. You don't need to be a master chef to bake that bread, it is extraordinarily easy to prepare! So, here it comes, in all its glory, the recipe for no-knead bread, adapted from Jim Lahey, Sullivan Street Bakery, New York City!
But before that, another confession - I don't actually use precise measures, so most of my baking and cooking go with the flow, if you know what I mean; it is directly proportionate to my mood, so what I love about this recipe in particular is that it measures everything in cups. But don't worry, as long as you stick to the same cup throughout the whole process, everything should be fine!
3 cups bread flour or all-purpose flour, plus more for shaping dough
1/4 teaspoon instant yeast (such as Fleischmann's RapidRise brand)
2 1/2 teaspoons salt
a pinch of sugar
1 1/2 cups plus 2 tablespoons tepid water
Cornmeal or wheat bran as needed
Dissolve the yeast in 1/2 of the water and add the sugar. I always do that even with instant yeast, just in case. Then combine it with the flour and salt in a large bowl. Add the rest of the water and stir until blended.
The dough will be shaggy and very sticky. Cover the bowl with plastic wrap. Let it rest at least 12 hours, preferably about 18 hours, at warm room temperature, about 70 degrees. The dough is ready when its surface is dotted with bubbles.
Turn it out on a lightly floured work surface and sprinkle it with a little more flour. Fold it over on itself once or twice. Cover loosely with plastic wrap and let rest for about 15 more minutes.
Using just enough flour to keep the dough from sticking to the work surface or to your fingers, gently and quickly shape it into a ball. Generously dust a cotton (not terry cloth) kitchen towel with flour, wheat bran or cornmeal, put the dough seam side down on the towel and dust with more flour, bran or cornmeal. Cover with another kitchen towel and let rise for 2 to 3 hours. When it is ready, the dough will be more than double in size and will not readily spring back when poked with a finger.
At least 30 minutes before the dough is ready, preheat your oven to 230 degrees. Put a heavy covered pot (cast iron, enamel, Pyrex or ceramic; anywhere from 31/2 quarts to 6 or 8 quarts) in the oven as it heats. When the dough is ready, carefully remove the pot from the oven. Slide your hand under the towel and turn the dough over into the pot, seam side up; it may look like a mess, but that's OK.
Shake the pan once or twice if the dough is unevenly distributed; it will straighten out as it bakes. Cover with lid and bake 30 minutes, then remove the lid and bake another 15 to 30 minutes, until the loaf is nicely browned. Cool on a rack.
Here is a very helpful video on the subject which will answer most of your questions but if you still have any, I am waiting for them!
Now tell me, do you like baking bread? Have you already tried this recipe and what do you think about it?